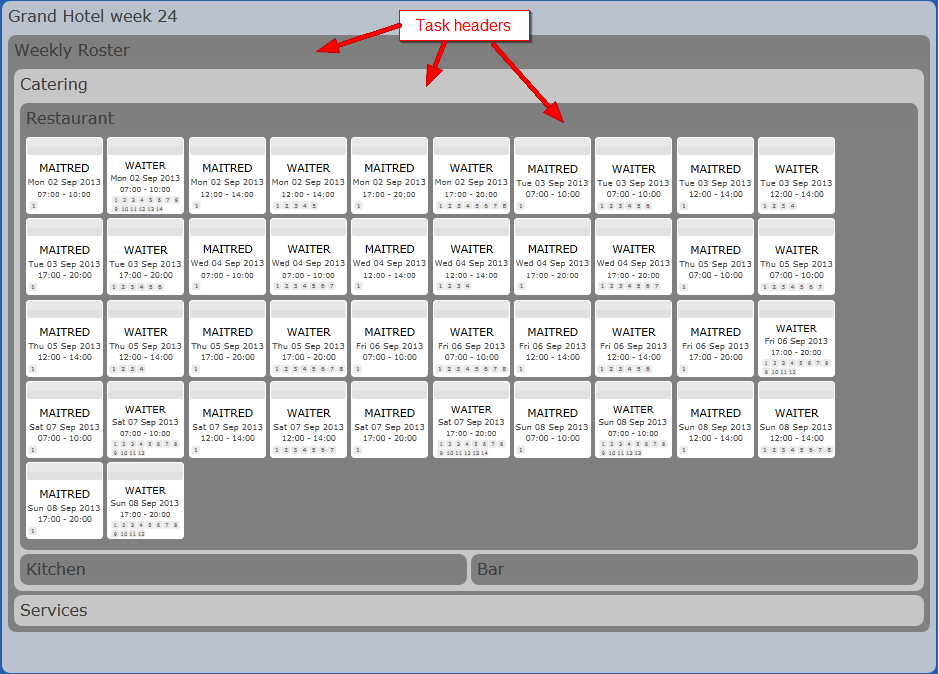
Tasks are used to divide up your project into different levels as you wish. For example, a Task can have sub-tasks which might represent the different departments or locations in your project.
In the example in Outline of the Solver user interface, the project: 'Grand Hotel week 24', contains a Task called 'Weekly Roster' which in turn contains 2 sub-tasks representing two departments within the project: 'Catering' and 'Services'. Each of these contain further sub-tasks for the different divisions within each department e.g. 'Restaurant', Kitchen' and 'Bar' divisions within the 'Catering' department.
The lowest tier within the project is the different Jobs within a Task or sub-task. These are represented by small boxes with a coloured (grey) header. See Jobs for more details.
The outermost box represents the entire project and differs from its sub-tasks. See Project for more details.
You can zoom in on a particular Task by clicking on its header. The Task is maximised within its parent Task. In the following example, the 'Restaurant' Task has been maximised within its parent Task 'Catering'.

Click on the header of the zoomed Task to reset its size.
Other Tasks in the project are minimized at the bottom of the user interface and can be maximised in the same way.
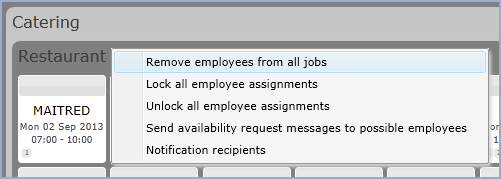
When you right-click in an empty area of a Task five options are available:

Note: there are different menu options in Edit mode, see Modify a Task for details.
Remove employees from all
jobs
Lock all employee assignments
Unlock all employee assignments
Send availability request
messages to possible employees this allows you to send a pre-defined
availability message, via email or SMS, to the Employees
that the Solver has identified
as being available to work. To send
availability messages you will need to have the Mitrefinch
Messaging Service set up outside of Rostering.
See Sending
availability messages for more details
Notification recipients
Send confirmation messages
to allocated employees
Note: Selecting one of these options for a Task will apply it to all of its sub-tasks.